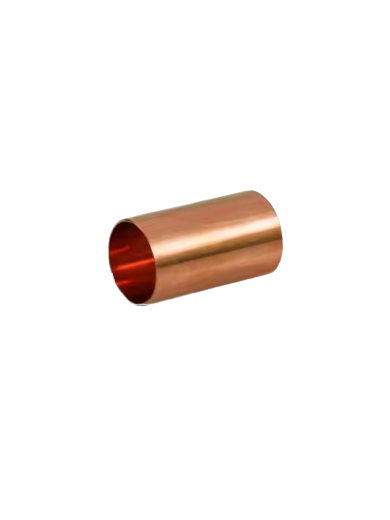
“1/2″ COPPER COUPLING” has been added to your cart. View cart
-40%
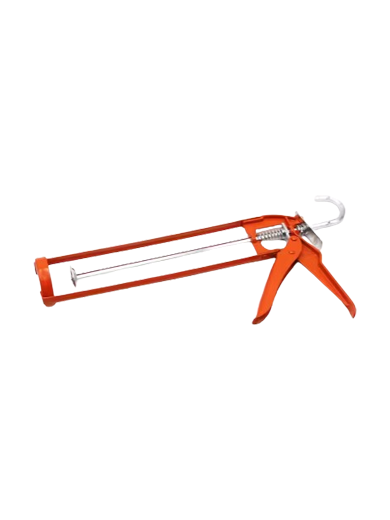
SILICON GUN (CAULK GUN)
$ 10.00 Original price was: $ 10.00.$ 6.00Current price is: $ 6.00.
Mastering the Use of a Silicone Gun for Home Improvement Projects
SEO Meta-Description: Learn how to use a silicone gun effectively for sealing and caulking. Discover tips, techniques, and maintenance practices to enhance your home improvement projects.
Introduction
A silicone gun, also known as a caulking gun, is an essential tool for any DIY enthusiast or professional contractor. It is primarily used to apply silicone sealant or caulk, providing a watertight and airtight seal around various surfaces. This comprehensive guide will walk you through the types of silicone guns, their benefits, and step-by-step instructions on how to use and maintain them effectively.
What is a Silicone Gun?
A silicone gun is a hand-operated tool used to dispense silicone sealant or caulk from a cartridge. It is commonly used for sealing gaps, joints, and cracks in various construction and home improvement projects. The gun ensures a controlled and even application of the sealant, making it easier to achieve a professional finish.
Types of Silicone Guns
Manual Silicone Guns
Manual silicone guns are the most common and affordable type. They require manual pressure on the trigger to dispense the sealant. They are suitable for small to medium-sized projects.
Ratchet Rod Silicone Guns
Ratchet rod silicone guns provide a more controlled and consistent flow of sealant. They use a ratchet mechanism that allows for precise application and are ideal for more detailed work.
Dripless Silicone Guns
Dripless silicone guns are designed to prevent excess sealant from dripping out of the nozzle after the trigger is released. This feature helps to reduce mess and waste, making them popular among professionals.
Battery-Powered Silicone Guns
Battery-powered silicone guns offer the convenience of automated dispensing. They are ideal for large projects that require continuous application and reduce the strain on the user’s hand.
Benefits of Using a Silicone Gun
Precision and Control
Silicone guns allow for precise application of sealant, ensuring an even and professional finish. This is particularly important for detailed work and tight spaces.
Efficiency
Using a silicone gun speeds up the sealing process, allowing you to complete projects more quickly and efficiently compared to manual application methods.
Reduced Waste
Silicone guns help to minimize waste by providing a controlled flow of sealant, reducing the likelihood of over-application and mess.
Versatility
Silicone guns can be used with various types of sealants and caulks, making them versatile tools for a wide range of applications, from bathroom and kitchen sealing to outdoor and automotive repairs.
How to Choose the Right Silicone Gun
Project Size
Consider the size of your project when selecting a silicone gun. For small to medium tasks, a manual or ratchet rod gun may suffice, while larger projects might benefit from a battery-powered gun.
Sealant Type
Ensure the silicone gun you choose is compatible with the type of sealant you plan to use. Some guns are designed for specific types of cartridges, so check the specifications before purchasing.
Budget
Silicone guns vary in price, with manual guns being the most affordable and battery-powered guns being more expensive. Choose a gun that fits your budget and meets your project needs.
User Comfort
Consider the ergonomics and weight of the silicone gun. A comfortable grip and lightweight design can make a significant difference, especially for extended use.
Step-by-Step Guide to Using a Silicone Gun
Preparation
- Safety First: Wear gloves and safety goggles to protect yourself from potential contact with the sealant.
- Read the Manual: Familiarize yourself with the silicone gun’s instructions and safety guidelines.
- Prepare the Surface: Ensure the area to be sealed is clean, dry, and free of debris.
Loading the Cartridge
- Release the Plunger: Pull back the plunger to make space for the cartridge.
- Insert the Cartridge: Place the silicone cartridge into the gun, nozzle first.
- Secure the Cartridge: Push the plunger back into the cartridge until it is snugly in place.
Applying the Sealant
- Cut the Nozzle: Cut the nozzle of the cartridge at a 45-degree angle to the desired bead size.
- Pierce the Seal: Use a nail or a similar tool to pierce the inner seal of the cartridge.
- Test the Flow: Squeeze the trigger to test the flow of the sealant on a scrap surface.
- Apply the Sealant: Position the nozzle at the starting point and squeeze the trigger evenly while moving the gun steadily along the joint or gap.
- Smooth the Bead: Use a caulking tool or a wet finger to smooth the bead of sealant for a professional finish.
Post-Application
- Clean the Nozzle: Wipe off any excess sealant from the nozzle to prevent clogging.
- Release the Pressure: Press the release lever to stop the flow of sealant and relieve pressure from the plunger.
- Allow to Cure: Follow the manufacturer’s instructions for the sealant’s curing time before exposing it to moisture or other elements.
Maintenance Tips for Your Silicone Gun
Regular Cleaning
Clean your silicone gun after each use to prevent the sealant from hardening inside. Use a suitable solvent or cleaner recommended by the sealant manufacturer.
Inspect for Wear
Regularly inspect your silicone gun for signs of wear and tear. Replace any worn or damaged parts to ensure smooth operation.
Proper Storage
Store your silicone gun in a cool, dry place. Ensure it is properly cleaned and dried before storage to prevent rust and damage.
Lubrication
Occasionally lubricate the moving parts of your silicone gun with a light machine oil to keep it functioning smoothly.
Common Issues and Troubleshooting
Sealant Not Dispensing Properly
- Check for Blockages: Ensure that the nozzle is not clogged.
- Release Pressure: Make sure the plunger is not applying too much pressure on the cartridge.
Inconsistent Flow
- Adjust the Pressure: If using a ratchet or battery-powered gun, check and adjust the pressure settings.
- Smooth Motion: Maintain a steady hand and consistent trigger pressure during application.
Dripping After Use
- Use a Dripless Gun: Consider using a dripless silicone gun to prevent excess sealant from dripping.
- Release the Plunger: Always release the pressure from the plunger after use to stop the flow of sealant.
FAQs
What types of projects are best suited for manual silicone guns?
Manual silicone guns are ideal for small to medium-sized projects, such as sealing bathroom fixtures, windows, and doors.
How do I choose the right nozzle size for my project?
Cut the nozzle at a 45-degree angle to the desired bead size, which should match the width of the gap or joint you are sealing.
Can I use any type of sealant with my silicone gun?
Ensure that the silicone gun is compatible with the specific type of sealant you plan to use, whether silicone, acrylic, or polyurethane.
What safety precautions should I take when using a silicone gun?
Wear gloves and safety goggles to protect yourself from contact with the sealant. Ensure proper ventilation in the workspace.
How often should I clean my silicone gun?
Clean your silicone gun after every use to prevent sealant buildup and ensure smooth operation.
What should I do if my silicone gun is not working properly?
Check for blockages, ensure the nozzle is not clogged, and inspect the gun for any worn or damaged parts that may need replacement.
Conclusion
A silicone gun is a versatile and essential tool for a wide range of home improvement projects. By choosing the right type of gun, following proper application techniques, and maintaining your equipment, you can achieve professional results and enhance the durability and appearance of your seals. Whether you’re a DIY enthusiast or a professional contractor, mastering the use of a silicone gun will significantly improve the quality of your work.


